

Booking a table is a fundamental function of the system and can be done quickly and efficiently. The following steps guide users through the process:
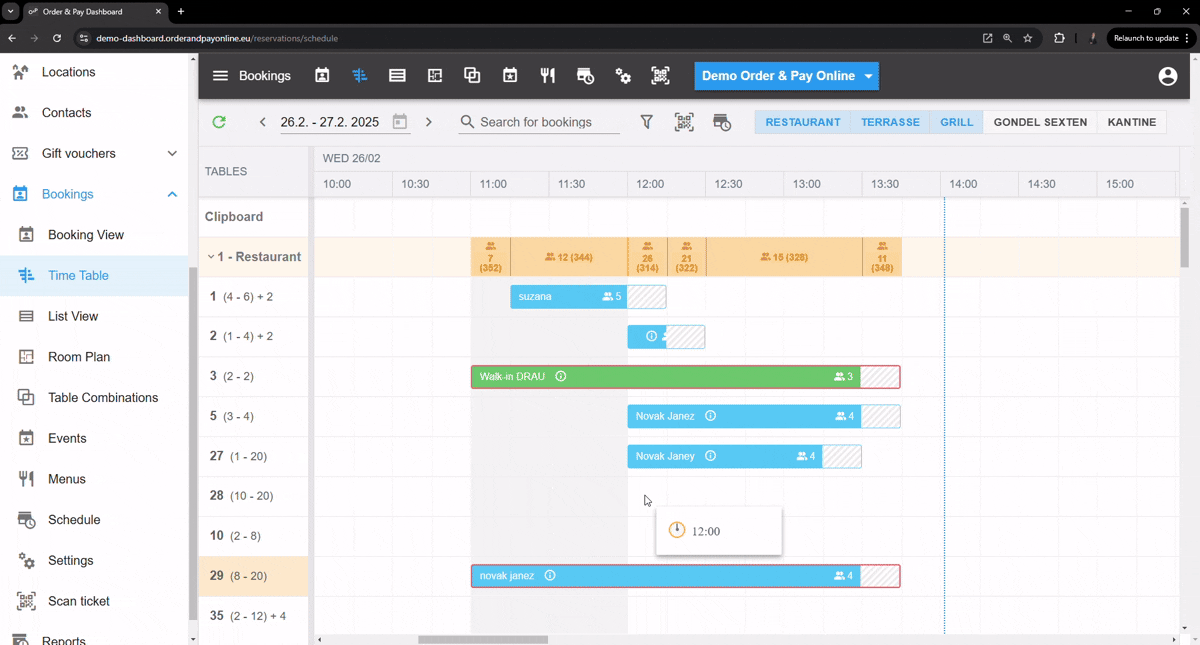
Navigate to Time Table view
Choose the Time Table view tab from the navigation menu.

- Create a new booking
- Single table: Double-click or drag on the timeline to create a new booking directly on the table schedule.
- Multiple tables: Select them on the far left, then double-click or drag on the timeline.
- Whole area: Clicking on the area name selects all tables for booking, then double-click or drag on the timeline.
- Individual tables in different areas: Select them on the far left across preferred areas, then double-click or drag on the timeline.
- All areas: Click on all preferred area names, then double-click or drag on the timeline.
- The booking form will open, and you can proceed with the steps above.
- Edit Booking Details
- Date, Time, Duration & Intermediate Time (if applicable): Are preselected but can be edited.
- Number of Guests: Indicate the total number of guests.
- Choose Booking Status
- Unconfirmed: The reservation is pending confirmation.
- Booked: The reservation is confirmed.
- Awaiting Payment: If a deposit or pre-payment is required.
- Waitlist: If no tables are available, the guest is added to the waitlist.
- Date & Time
- Date, Time, Duration & Intermediate Time (if applicable): Are preselected but can be edited.
- Events
- Choose an Evnet (if applicable)
- Number of Guests
- Indicate the total number of guests.
- Tables
- The system will suggest tables based on availability.
- You can also manually assign or adjust the selected table(s).
- Guest Information
- Walk-ins: All the required data is filled in, and you can confirm the booking form.
- Guest Surname & Email fields: Mandatory for booking confirmation and reminders e-mails. Add or pick the guest from the list.
- Name, Company and Phone number: These fields are optional.
- Add Notes
- Any additional guest requests, such as seating preferences or allergies or info’s for the waiter.
- Use the ‘+’ on the right side of the line to add multiple entries.
- Order form/Work order
- Add the order form name/number
- Upload a pdf, jpg, jpeg file
- Marks
- Add marks like ‘VIP’, ‘Birthday’, or ‘Vegetarian’ for better preparation and guest experience.
- Confirm
- Click Confirm to finalize the booking.
- A confirmation email is sent to the guest if an email is assigned in the guest section.
FAQ
Q: How do I change the date of an existing booking?
A: Edit the reservation and select a new date/time before confirming.
Q: Can I assign multiple tables to a single reservation?
A: Yes, the sistem will suggest most optimal tables, but you can manually assign multiple tables in the booking process.
Q: How do I enable automatic booking confirmations?
A: Go to Settings → General Settings and enable the Automatic Booking Confirmation option.